Template FLEXIcontent - Part 3 : Entering data into content


This tutorial is offered by NetAssoPro, you can find all components, modules and plugins for FLEXIcontent here
NOTE : This tutorial is actualy good, but we work on it to update it with new option introduce in stable version.
To continue my previous tutorials, we will see in this part what are the possibilities for entering content using FLEXIcontent.
There is nothing very technical in this chapter but it will allows users who have not yet decided to choose this component to have a real overview of the different entry form, and to see once more the expanded opportunities FLEXIcontent.
Tutorial Summary
- Creation of content
- Entry field types and general information
- Entry of custom fields
Creation of content
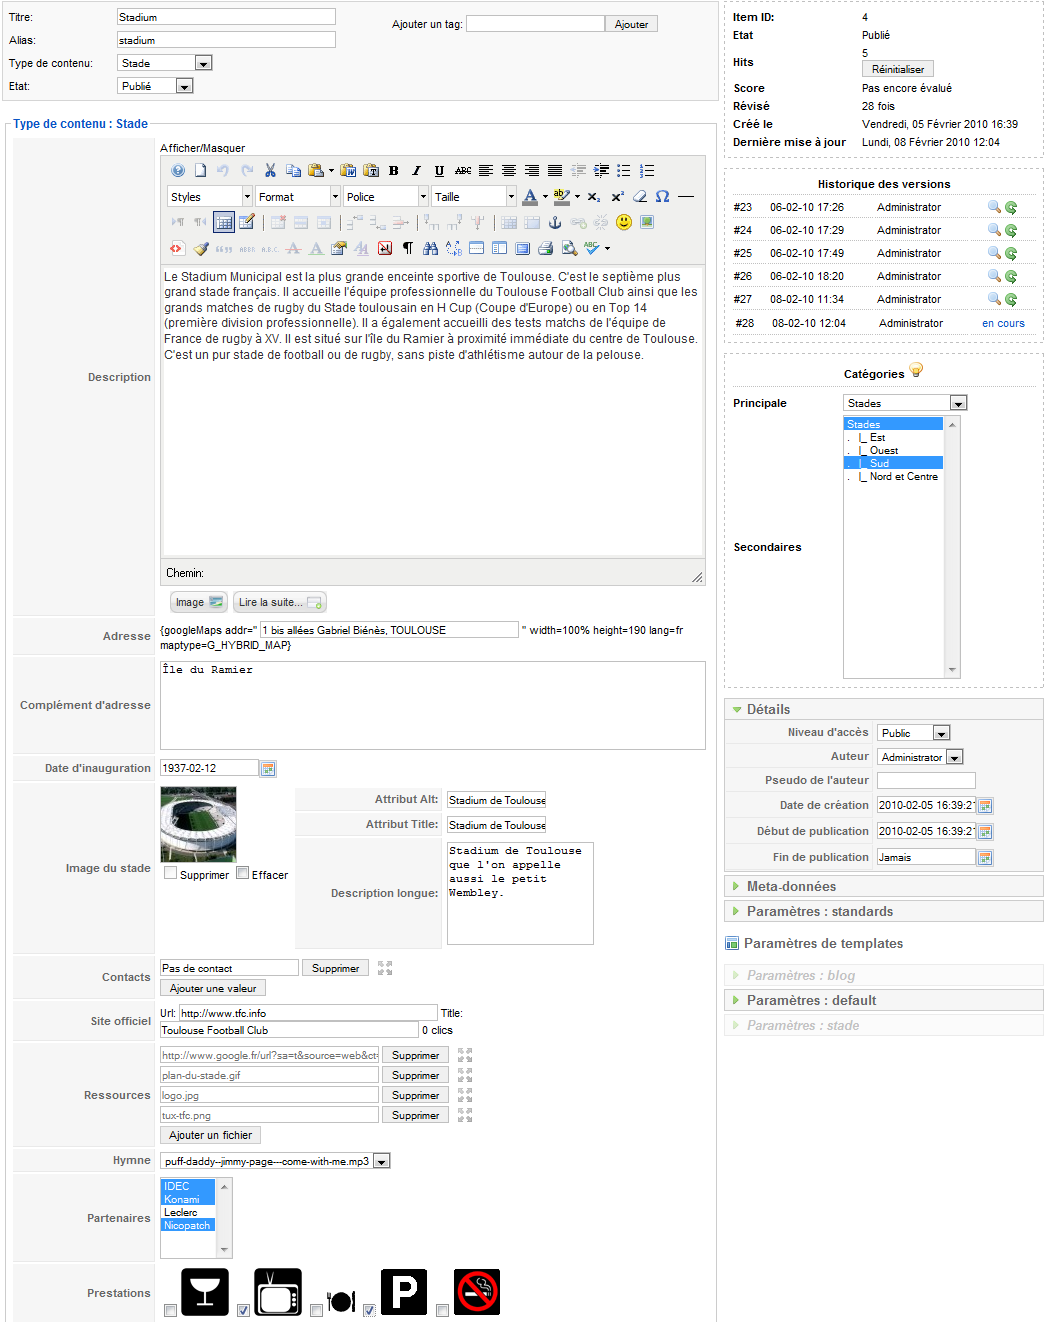
We'll set up our first content-type "stade", I go to the "Contents" then I click "New".

Before displaying specific areas to capture that we want, it is imperative to fill three Information:
- The title (Stadium)
- The content type (Stade)
- The main category (Stades)
Once these three information entered, I click the "Apply" button to save and stay on the same entry page.
My areas appear in the order defined by my fields. If you want to change the order of input fields, you need to go in the "Fields" of FLEXIcontent then use the following filters: Choose a field type = Visible in a form and choose a type = Your type. You can then change the order in the list that appears.
Entry field types and general information
Some fields and information are common to all types. The information are editable or not, can be reused in our template in frontend.

- Title : Your content title
- Alias : The alias that help to build your SEF URL
- Content Type : The user selects the type of content they wish to add. Again, all are simplified for the user, a single page to enter all the information he wishes to add or change on its website. This will simplify his handling.
- Status : Draft, Pending, In Progress, Published, unpublished, Archives: these states allow you to manage a workflow of your content. By default when you create new content it will change in the status of Draft. Just think out the switch statement published at the end of the writing if you want to publish it directly.
- Add a tag : Another interresting thing about FLEXIcontent, you can associate an unlimited number of keywords that allow you to reference and find your content more easily. A tag cloud module was developed, you can download it here.
- Item ID : Incremental number that identifies the contents.
- Hits : The number of times the content was seen.
- Score : Visitors can evaluate a content of 1 to 5, the score is displayed here.
- Revised : The number of times the content has changed.
- Created : Date and time of content creation
- Last Update : Date and time of last modification of the content
Versioning
FLEXIcontent manages the versioning of your content, meaning that at any time you can restore a previous version (in case of input error, for example). Default FLEXIcontent keeps the history of the last 5 versions of the content (that is a parameter that are possible to change the general settings FLEXIcontent, available values are: 5,10,20,50,100. However it is advisable not to exceed 10 in order not to increase your database).
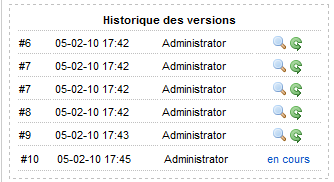
When writing or editing your content, you can view and interact with history. It appears in chronological order with the author name of each version. You can get a overview between the current version and an older version by clicking on the magnifying glass icon.Then, If you want to restore the version, simply click on the green arrow ... is simple and is very convenient.
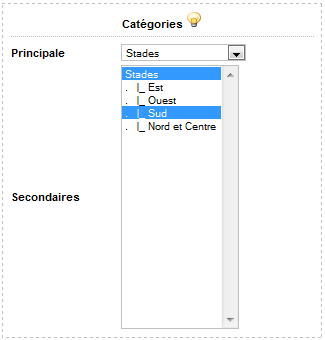
Categories
It is required to associate each contained to a main category to determine the inheritance of permissions and the url rewriting but it is also possible to assign sub categories to list the content in different sections. Level category tree is unlimited and you can also assign as many categories as you want to a content, simply press the left control key and click on the desired categories.
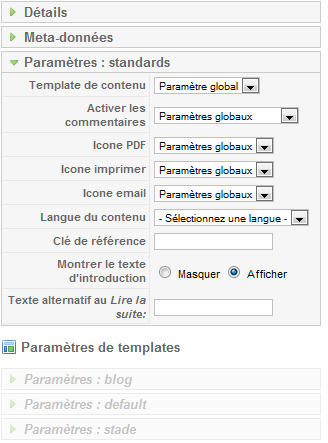
Others Parameters
Apart from the details and the meta data options that are common to the management of native Joomla articles, FLEXIcontent offers two additional parameters:
- You can customize each content by forcing template. If we do nothing, it will automatically inherit the template assigned to the type of content. By enabling this setting, the parameters of the template associated is activated automatically.
- It can also lock or exceptionally authorize comments on an article, FLEXIcontent is compatible with JComments and Jom comment.
Entering description field
Entering the description field (which may have a different name if you have decided to rename it) is identical to the content Jommla articles. However, I recommend you to install the JCE editor with JCE Advanced Link plugin for FLEXIcontent (attention this plugin must be installed via JCE Administration and not joomla) this plugin will allow you to easily links your categories, content and tags FLEXIcontent, moreover it is fully compatible with the url rewriting.
Entry of custom field
I will now illustrate the different entry form that you have created in the previous section of this tutorial.
To understand each of these examples please refer to the previous section of this tutorial that explains how to configure custom fields.
For each field we can find the description that had been filled in order to "help the user in his entering process".
Important: in the previous section when creating the fields I inserted the quote character (") several times, that is not compatible and will truncate your description, so I replaced it with a single apostrophe character (').
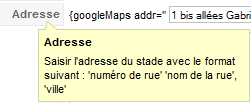
Text : "Address"
![]()
I decided to apply the plugin Google Maps on my fields, the code will appear automatically for reminding me (hint: it is possible to remove the code by selecting the option in the field "Remove spaces"). I note that my area is also a little narrow, I change my settings for fields to rise to 60 characters.
Textarea : "Address Complement"

There is nothing specific, the area appears in the size I wanted. Remember that I could enable the "html editor" to create an area identical to the "description" field.
Date : Opening Date
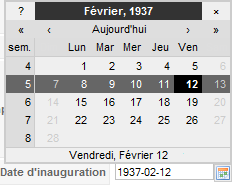
The date fields have a popup window that helps the user in his input. The date must be entered and saved in the following format: yyyy-mm-dd. The display format of the date frontend is completely independent, I had for my part defined in dd / mm / yyyy in the parameters of the field.
Picture : "Stadium Picture"
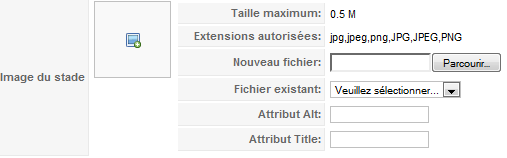
Before you load your image, a first screen tells you the maximum size permitted and extensions for uploading. You can either load a new image or select an image you've uploaded via this field. Finally you can assign the HTML alt and title to your image.
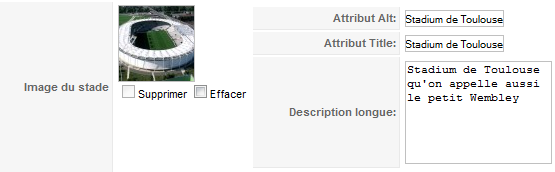
Once the image is selected, the upload is done automatically and the page refreshes to display a thumbnail of the image. It is possible to add a description of the image that will appear when viewing in popup mode.
Finally, two check boxes to remove the image content appear below the thumbnail.(Not selected when the image was added via an existing file, deleted selected it when a new image).
Email : "Contact"
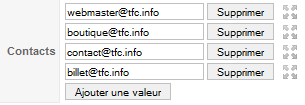
With the authorization of multiple values, it is possible to enter different values for each new entry by clicking on the button "Add Value". Once the input value can either delete or rearrange the display order via the icon with four arrows that allow to achieve a drag & drop.
I just regret that at present there have no control over format of the seizure, the user can enter what they want and then generate inconsistencies in the future.
Weblink : "Official WebSite"
![]()
The weblink is composed of two areas : the Internet link, then the text will appear. Finally a counter clicks will tell you how many times the link has been visited.
File : "Ressources"

Multiple field is activated, I can add multiple files, I can delete or move the same way as for the field "contact" we've seen before.
Clicking on the button "Add File" opens the FLEXIcontent media manager.You can then select an existing file, or to add a new one. For this there are two methods:
- Add a file :
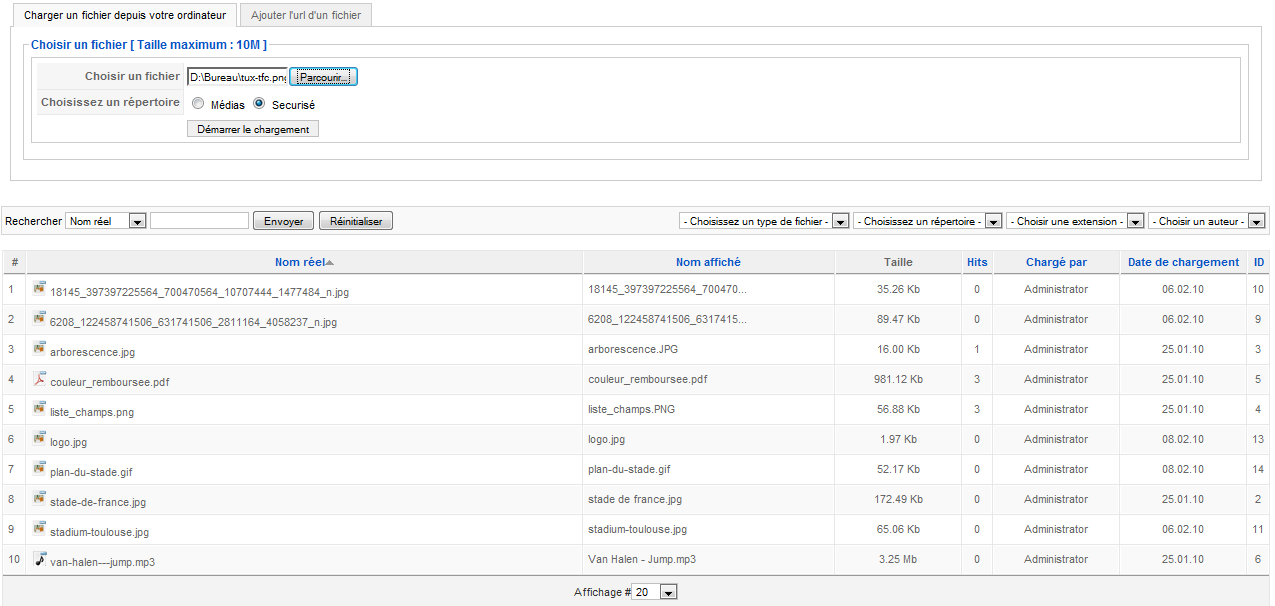
Select your computer file, select the directory of the media (url of the file visible to the user) or the secure directory (the URL will be coded for the user) - for information these two directories are defined in general settings of FLEXIcontent and for safety reasons it is best to change the default - then click the Start button to load your file to add to the library of media.
- Add an URL :
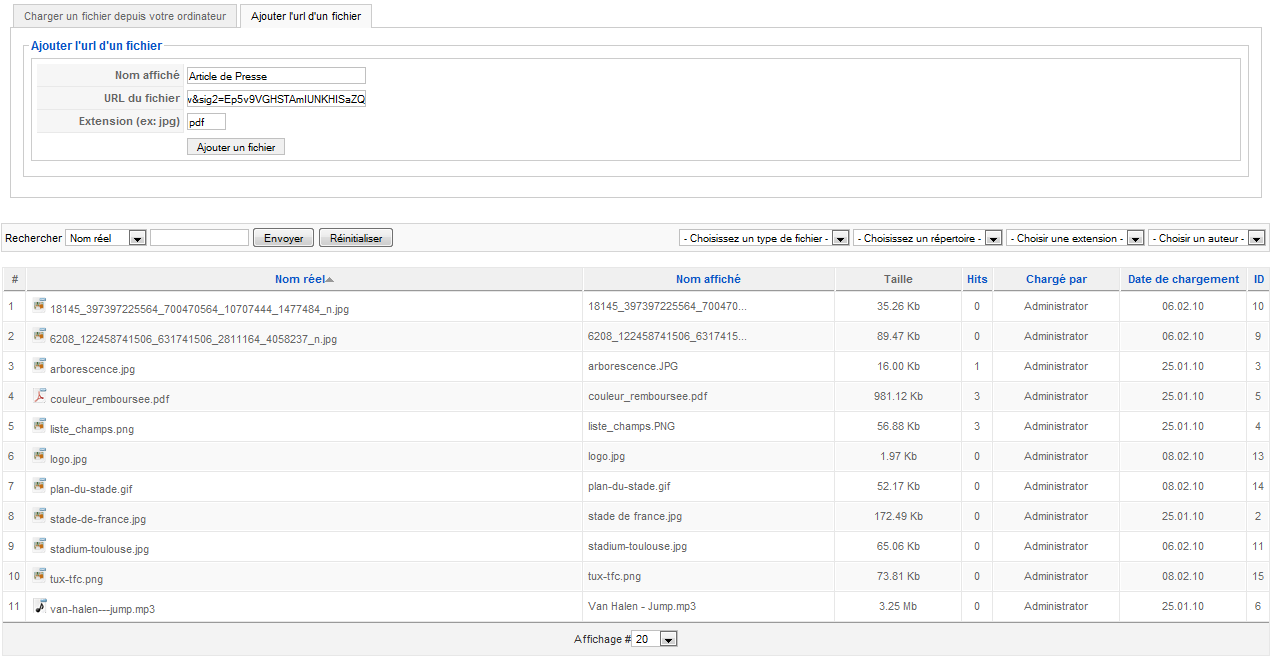
In order not to overload your own server, you can also add your library media remote files. Enter the link, the name you want associated with this file and then its extension so that FLEXIcontent know the mime type to associate of the openning of the file.
Select : "Anthem"
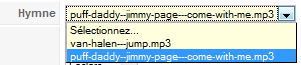
I bind my list directly to my media library allows me to bring up all my mp3, I can only select my anthem. I can use the previous field to upload new mp3, then simply record my page for my new mp3 to appear in my list.
Multiple Select : "Partners"

My multiple list (slightly modified - see previous section) is attached to the banner of Joomla, I can select multiple leaving press the control key.
Checkbox image : "Services"

"Television service" is selected as my default settings, I just have to select the options that I want.
That is over for this part, the next time I will show you how to code the content templatea and present you all the possibilities and variables to use.
Last FLEXI-site