Adding position in item view
Adding position in item view

DO NOT CUSTOMIZE AN BUILD IN TEMPLATE !!!
Be carefull, all template are update after all FLEXIcontent component update.
I recommend to use html5 template.
Duplicate Template
- Choose your template to copy (blog doesn't have tab, if you need it use items-tabbed)
- Click on duplicate

- Rename it
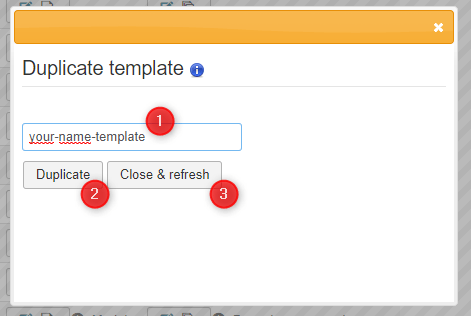
- Close the popup
To allow drag and drop position we need to add a position in XML
Edit your template in single content column
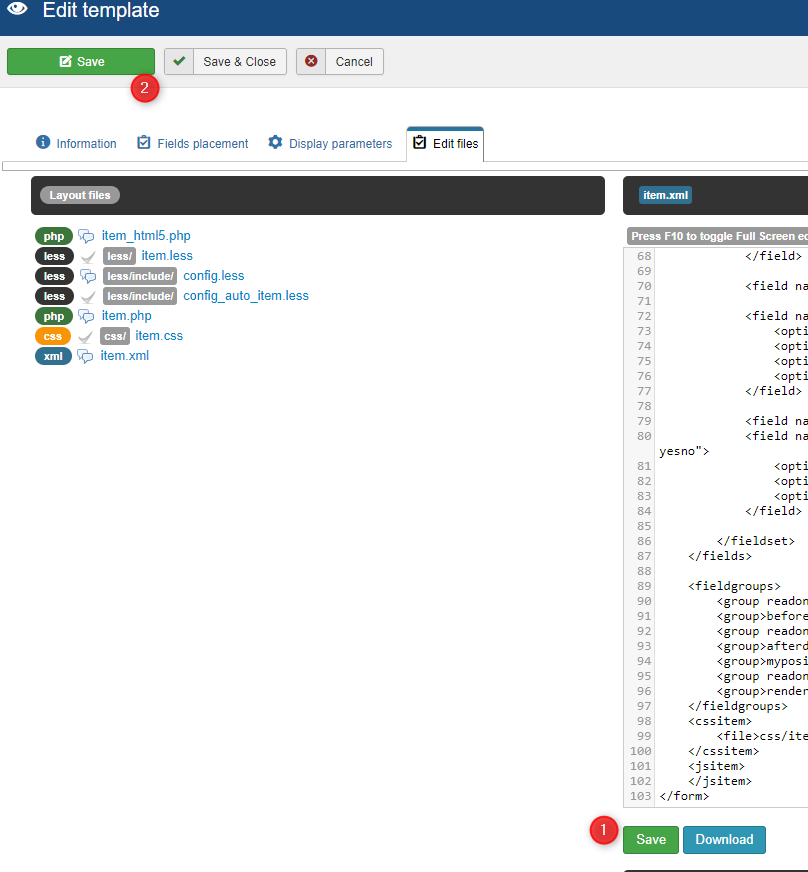
- Go to edit file tab
- Edit item.xml
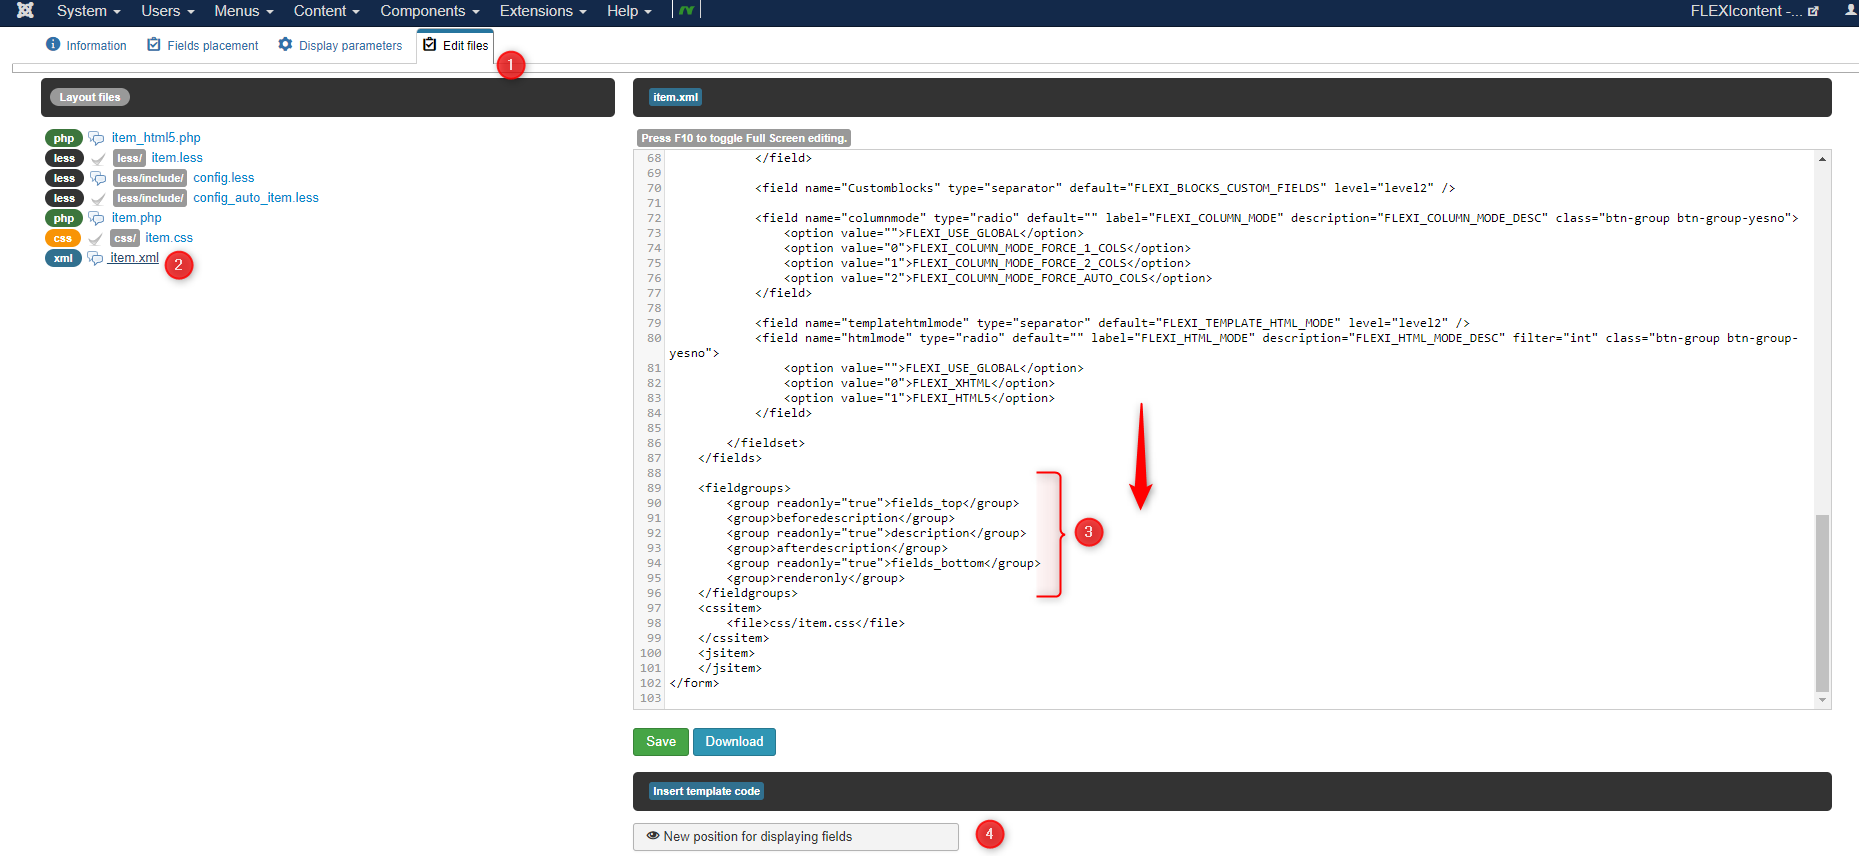
- Use "New position for displaying fields" button to copy snapshot code
- Put in in fieldgroup part
- Rename
myposition like informations (don't use space or é...) 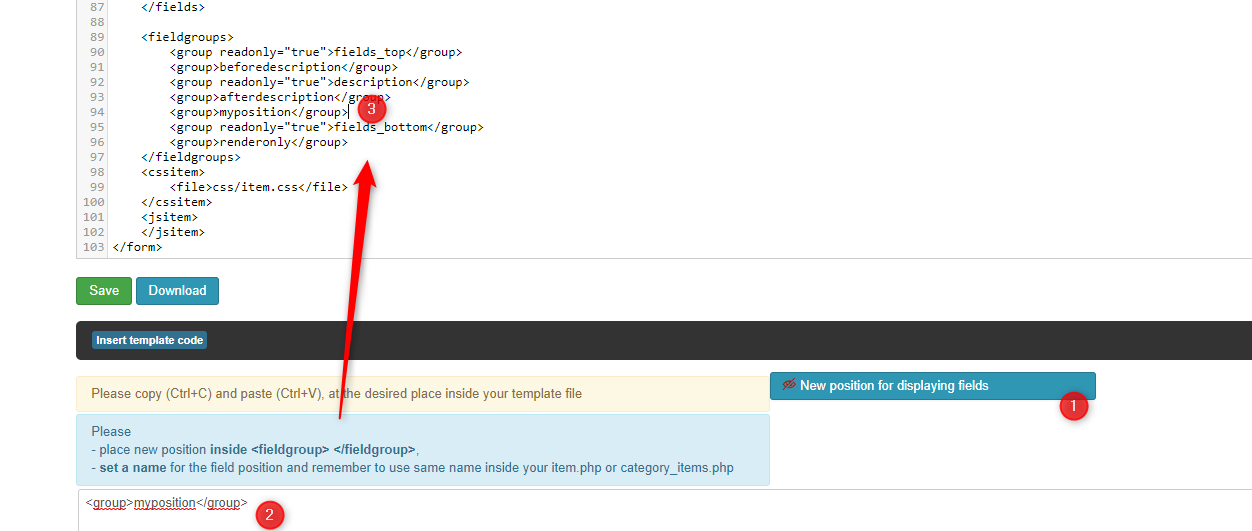
- Save file
- Save template
Now you can drag and drop field in position. But no field were display because we need to add php code for render
Adding PHP code for render all fields in position
- Go to edit file tab
- Edit item_html5.php
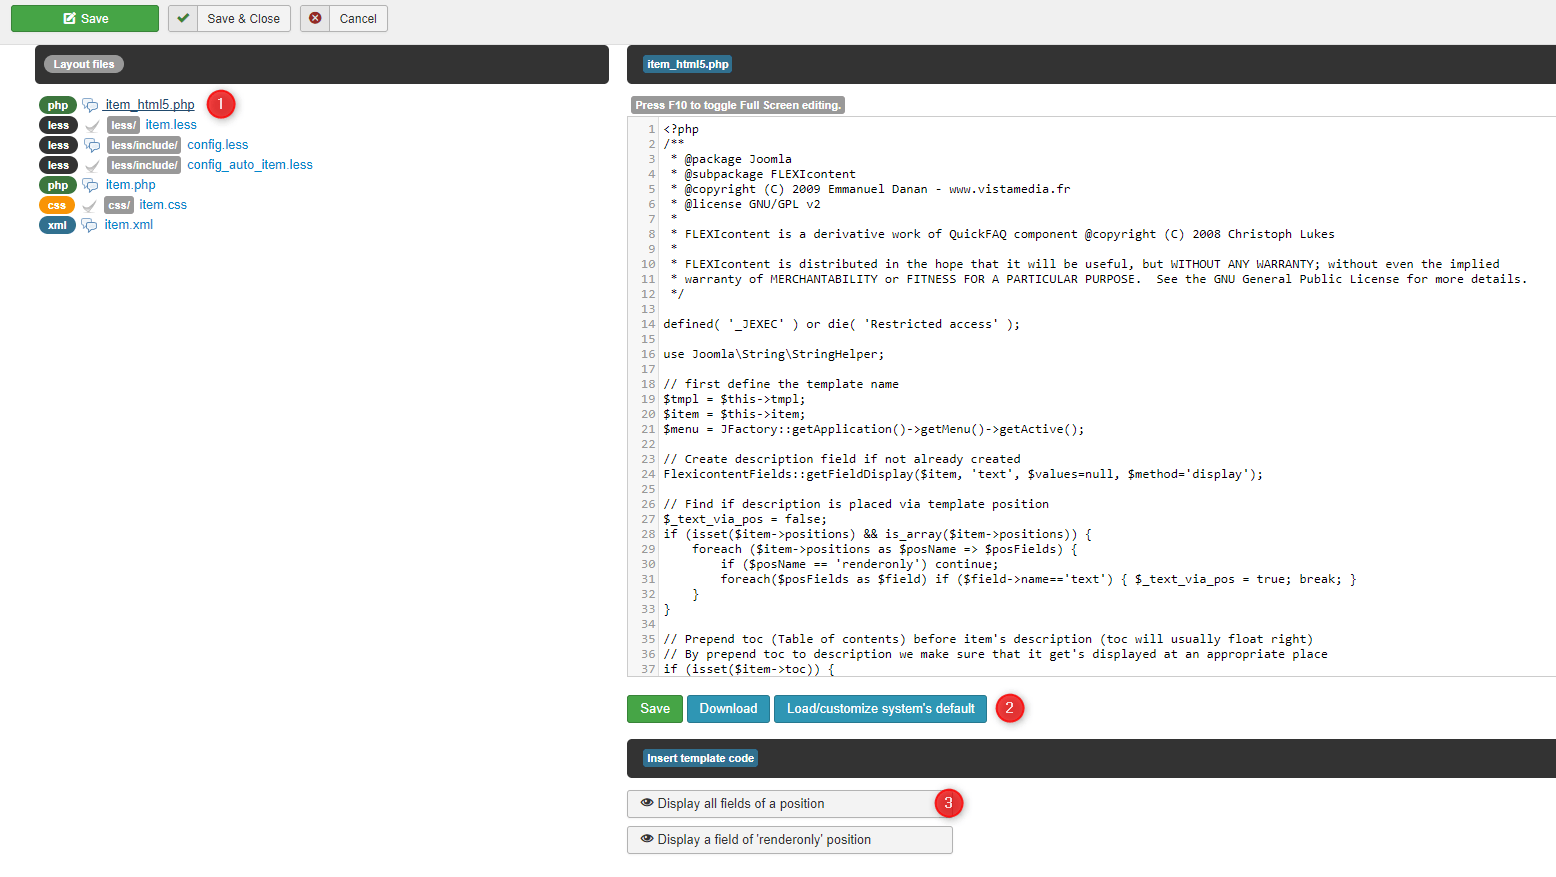
- Use" load/customize system's default" to give the original code and edit it
- Click on "Use display all fields of a position" button
- Check the code and remplace $_position_name = "myposition" by $_position_name = "informations" (same name of position in XML)
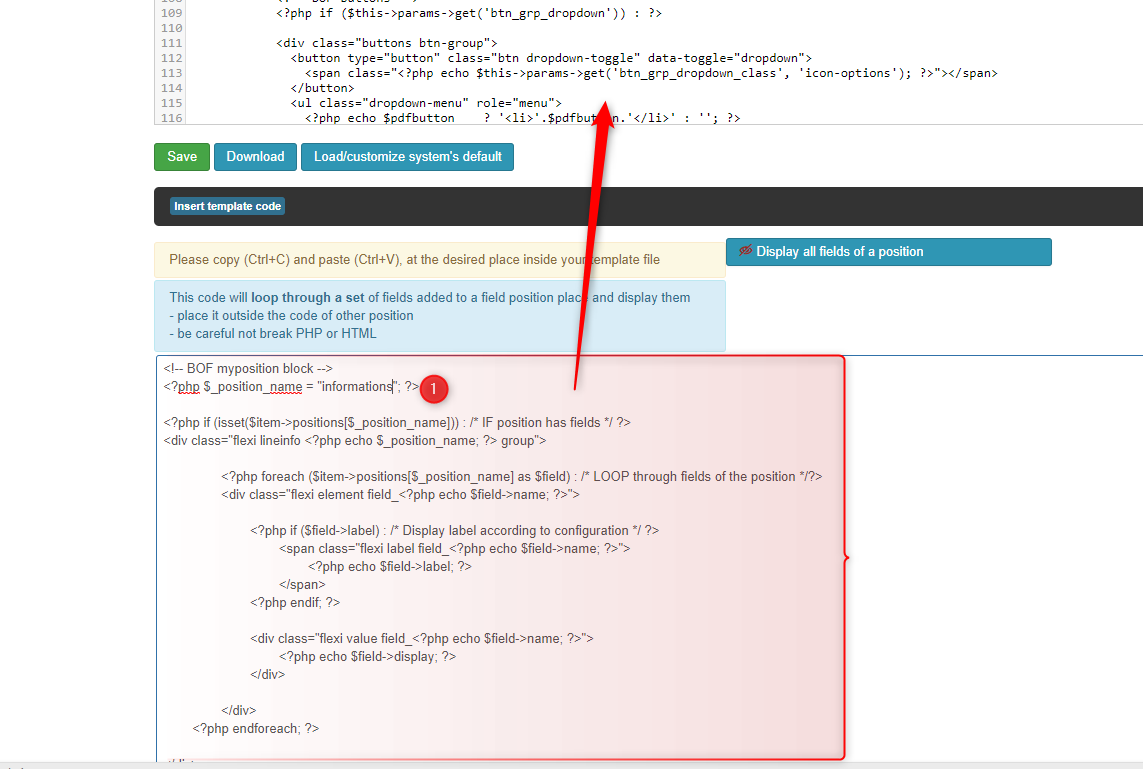
- Copy code
- Past in template code where you want to display
- Save file
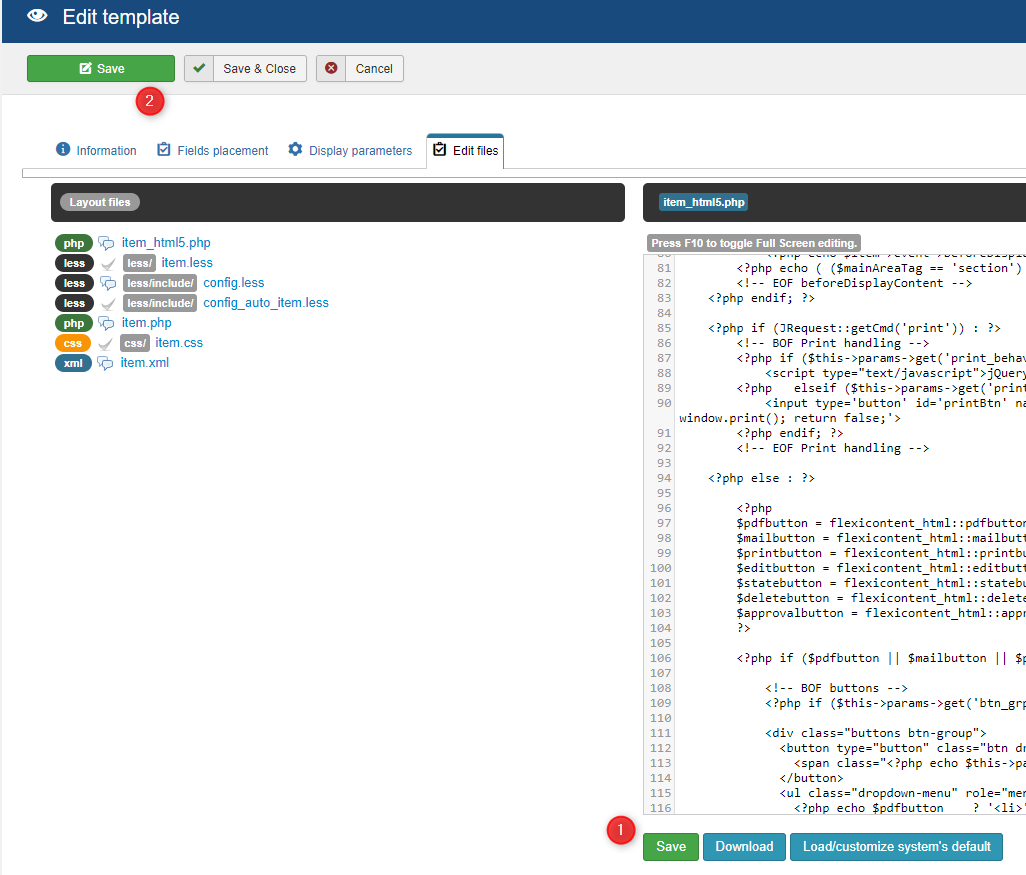
- Save template
That it, now you can drag and drop your fields in your position !
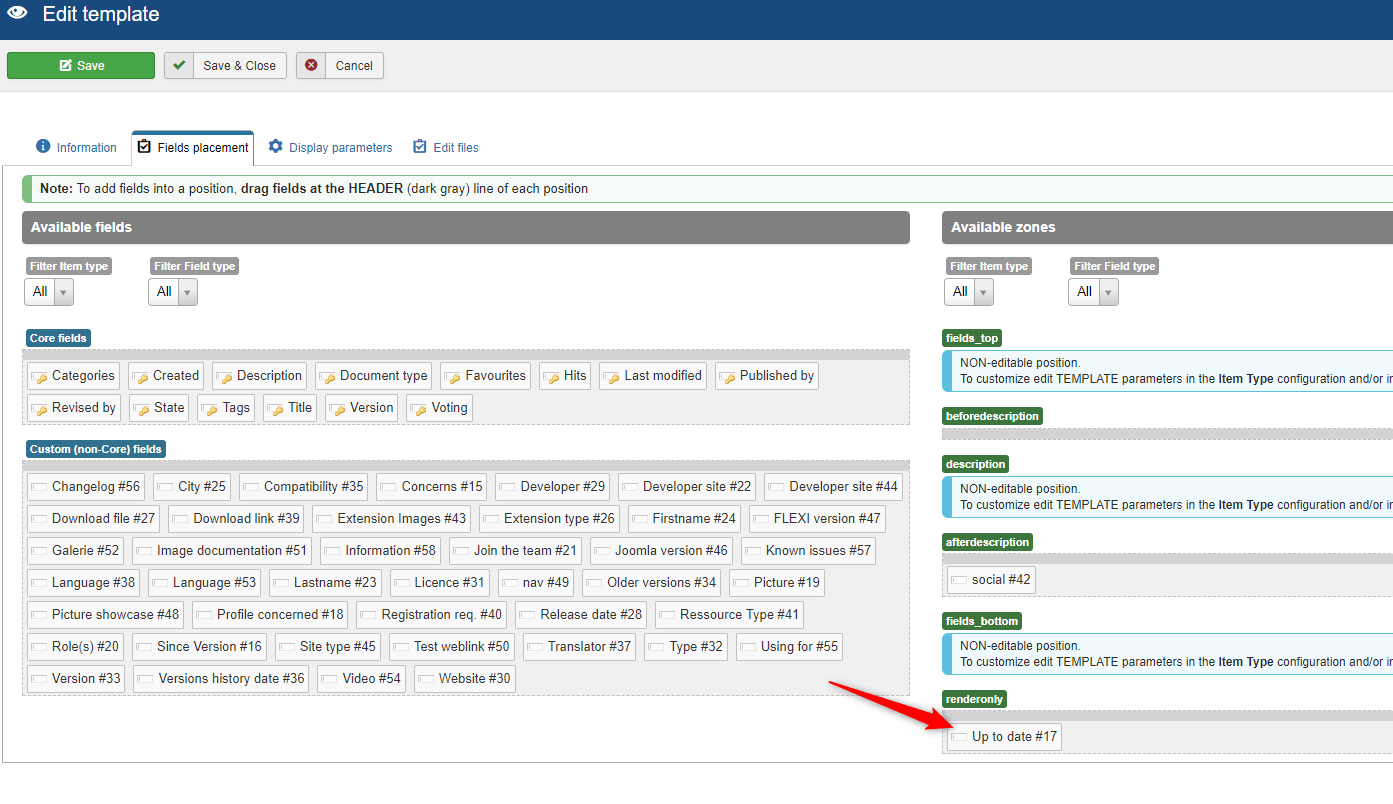
Use field without position
- Put your field in render only position
- Edit item_html5.php
- Use button "Display a field of 'renderonly' position"
- Change ["fieldname"] by ["yourfieldname"]
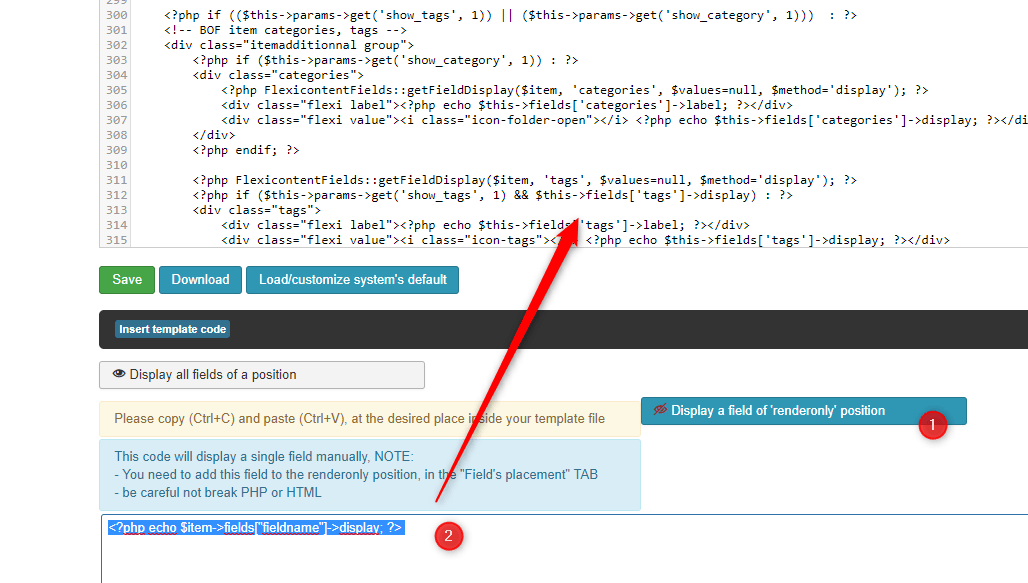
- Copy code
- Past in template field where you want to display
- Save file
- Save template
Enjoy !